If you’re interested in woodworking but not sure where to start, you’ve come to the right place! In this article, we’ve compiled a list of 35 simple and inspiring wood projects perfect for beginners. No matter your skill level, these DIY projects will help you build your woodworking abilities while igniting your creativity. Get ready to embark on an exciting journey of wood crafting!
Quick Reference for all 35 Beginner Woodworking Projects
- DIY Mail Organizer
- DIY Wall Folder Organizer
- DIY Divided Storage Bin
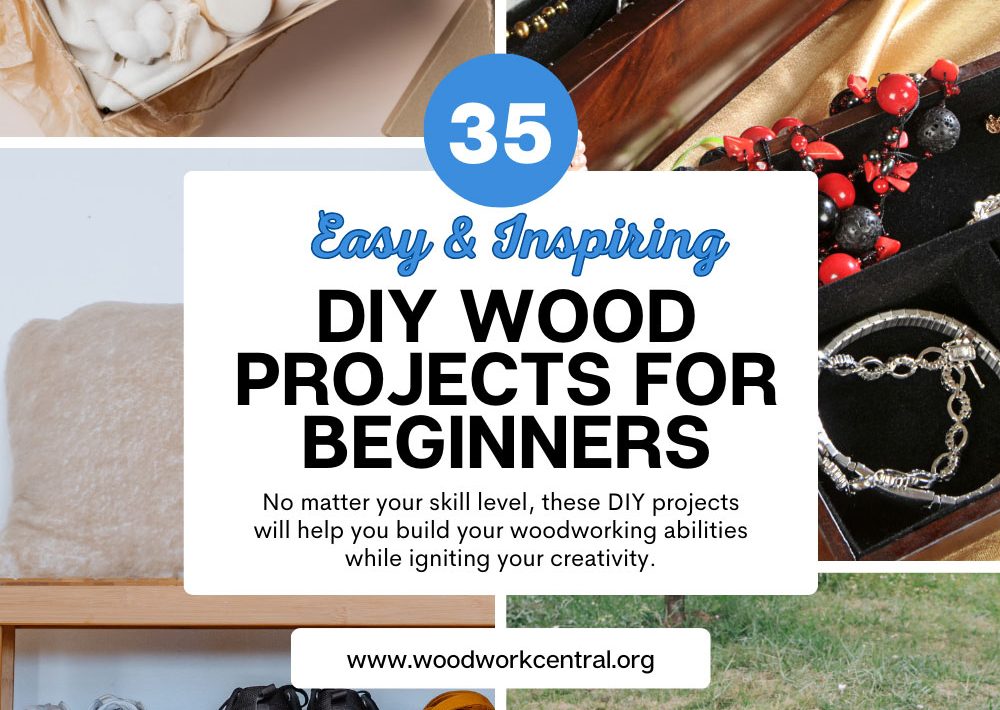
- DIY Jewelry Holder
- DIY Entryway Shelf With Hooks
- DIY Dinosaur Shelf
- Easy DIY Magnetic Chalkboard for the Kitchen
- DIY Phone Stand for desk
- DIY Lap Desk
- DIY Corner Vegetable Storage Bin
- DIY Spice Rack Or Craft Paint Organizer
- DIY Under Bed Shoe Organizer
- DIY Kids Table and Chair Set
- DIY Kids Table with Hidden Storage
- DIY kids bedside table with book storage
- Modern Dog Bowl Stand
- DIY Sand and Water Table for Toddlers
- DIY upholstered 2×4 Bench
- DIY Floating Ladder Shelf
- Simple Industrial Farmhouse Bench
- X-leg Console table
- DIY C-Table with Mirror Accents
- DIY Modern BookShelf
- Easy DIY Upholstered Headboard with Nailhead Trim
- DIY Lattice Planter Box
- Easy $20 DIY Outdoor Table
- $10 DIY Tiered Planter Box
- DIY Raised Tiered Garden Beds
- DIY Rustic Coasters
- Simple Birdhouse
- DIY Picture Frame
- Wall-Mounted Key Holder
Key Takeaways:
- These wood projects are suitable for beginners.
- Woodworking is a great hobby that helps develop new skills.
- You can create beautiful and functional items from wood.
- Our DIY projects will ignite your creativity.
- Get started on your woodworking journey today!
Essential Tools for Woodworking Beginners
Woodworking is an enjoyable hobby and craft, and for beginners, having the right tools is essential to taking on projects and developing your skills. The following is a comprehensive list of basic and beginner woodworking tools that are necessary for completing the projects in this article:
| Tool | Function |
|---|---|
| Hammer | Used to drive nails and attach wood pieces together. |
| Tape Measure | Required for measuring and marking wood accurately. |
| Saw | Essential for cutting wood to size and shape. A handsaw, circular saw, or jigsaw is recommended. |
| Sanding Block | Used for smoothing rough edges of wood and finishing surfaces. |
| Cordless Drill | Needed for making holes and attaching screws. A drill driver and impact driver combo kit is ideal for beginners. |
| Screwdrivers | Essential for turning screws in various sizes and shapes. A set that includes different tips (Phillips, flathead, etc.) is recommended. |
| Chisels | Used for carving and shaping wood. A set that includes a few different sizes for versatility is best. |
| Workbench | Required for holding your projects in place while you work on them. A sturdy and level surface is important for accuracy and safety. |
In addition to these basic tools, having eye and ear protection, clamps, and gloves are recommended for safety purposes.
By having these essential beginner woodworking tools, you’ll be equipped to take on the projects in this article with ease and confidence. Happy woodworking!
Building a Simple Wooden Planter Box
Adding some greenery to your home or garden can be as easy as building a simple wooden planter box. This project is perfect for beginners and can be completed in a few quick steps. Follow these instructions to create your very own wooden planter box:
- First, gather your materials. You will need:
- Wood boards (untreated or pressure-treated)
- Wood screws
- Drill
- Saw or a handheld saw
- Sandpaper
- Measuring tape
Next, measure and cut the wood boards to the desired size and shape of your planter box.Using the drill and wood screws, assemble the sides of the planter box by attaching the boards together.Sand the corners and edges of the planter box to ensure a smooth finish.You can also apply wood stain or paint to the planter box for a polished look.Add soil and your favorite plants, and your wooden planter box is ready for display!
With just a few simple tools and supplies, you can create a beautiful and functional wooden planter box to bring a touch of nature to your home or garden. Happy crafting!

Creating a Personalized Wooden Cutting Board
Upgrade your kitchen equipment and showcase your carpentry skills by crafting a personalized wooden cutting board. With just a few materials and some basic tools, you can create a functional and unique cutting board that will add a touch of character to your home. Plus, every time you use it, you’ll have the satisfaction of knowing you made it yourself!
To get started, you’ll need a few essential materials, including hardwood lumber (such as maple or cherry wood), wood glue, and food-safe finishing oil. You’ll also need to have some basic woodworking tools, such as a saw, sander, and router, on hand. Don’t worry if you don’t have all the tools, this project is manageable for beginners, and you can rent tools if needed.
Step-by-step Guide
- Cut the hardwood lumber into boards of the correct sizes to form the cutting board. You can create your unique design or use a template. Be precise in measuring and cutting to ensure a smooth assembly process.
- Sand all sides of the wood boards until the surface is smooth with 220-grit sandpaper. This process removes any roughness and prepares the surface for finishing.
- Arrange the wooden boards in the desired pattern, apply some wood glue, and clamp them together. Let the glue dry completely, usually around 24 to 48 hours.
- Use a router to round off the edges and create rounded corners. Sand the rounded edges and corners to a smooth finish.
- Finish the cutting board with food-safe finishing oil, such as a combination of mineral oil and beeswax. Apply the oil on the surface and let it absorb, then wipe off any excess oil with a cloth.
With these simple steps, you can create a beautiful and functional cutting board, perfect for entertaining guests while impressing them with your carpentry skills.
Crafting a Rustic Wooden Shelf
Nothing quite adds character to a room like a rustic wooden shelf. With just a few simple materials and tools, you can create a customized and charming shelf that fits perfectly in your home. In this section, we’ll show you how to craft a rustic wooden shelf that will give your space an inviting and cozy feel.
Materials Needed
| Materials | Tools |
|---|---|
| 1×8 wood board | Table saw |
| Wood glue | Drill |
| Screws | Measuring tape |
| Stain or paint | Sandpaper |
| Clear coat | Paintbrush |
Note: You can customize the shelf by using a different type of wood or adding decorative elements such as brackets or hooks.
Step-by-Step Instructions
- Measure and cut the wood board to the desired length of your shelf.
- Sand all sides of the board until smooth.
- Using wood glue, attach the board to the wall bracket.
- Drill pilot holes into the board and then screw it onto the bracket.
- Apply the stain or paint to the shelf and let it dry.
- Once dry, apply a clear coat to protect the wood.
- Install the shelf on the wall using your preferred method.
- Lastly, decorate the shelf with your favorite items and enjoy!
By following these simple steps, you can create a rustic wooden shelf that will add charm to any room in your home. Don’t be afraid to get creative and customize the shelf to fit your personal style!
Building a Wooden Wine Rack
If you enjoy wine, a wooden wine rack is the perfect addition to your home. With just a few simple tools and materials, you can create a custom wine rack to fit your collection and décor. Follow our step-by-step guide to build your own wooden wine rack.
Materials:
- 2 8-foot 1×4 boards
- Saw
- Drill
- 10mm spade bit
- Measuring tape
- Sandpaper
- Wood glue
- Wood stain or paint
- Paintbrushes
Instructions:
- Cut the boards into the following pieces:QuantityLengthFunction232 inchesVertical supports218 inchesTop and bottom supports412 inchesShelves
- Use the spade bit to drill 10mm holes in each of the shelf pieces, 2 inches apart and 1 inch from the front and back edges.
- Use sandpaper to smooth any rough edges on the cut pieces.
- Assemble the wine rack by attaching the top and bottom supports to the vertical supports using wood glue and screws.
- Insert the shelves into the drilled holes, securing them with a dab of wood glue if desired.
- Sand any rough areas or sharp corners to your desired finish.
- Apply wood stain or paint of your choice to the wine rack, following the manufacturer’s instructions.
Once the stain or paint has dried, your wooden wine rack is ready to use! Display your wine collection proudly and impress your guests with your handmade creation.
Designing a Wooden Jewelry Organizer
If you’re tired of rummaging through cluttered drawers to find your favorite jewelry, why not make a stylish wooden jewelry organizer? This DIY project will not only keep your accessories organized but also add a touch of rustic elegance to your room.
The process of creating a personalized jewelry organizer is simpler than you might think. All you need is:
- A wooden board
- Small hooks
- Screws
- A drill
- A saw
- Sanding paper
- A measuring tape
- A pencil
First, decide how many hooks you want to install and mark their positions with the pencil. Next, use the drill to make small holes on the markings. Screw the hooks in place, and sand the board to smooth out any rough edges.
You can get creative with the aesthetics of your wooden jewelry organizer by painting it in your favorite color or staining it to highlight the natural wood grain. Mount it on your wall, and voila! You now have an organized and stunning jewelry display that you can be proud of!
Not only does this organizer help you save time and hassle, but it also serves as an easy-to-reach conversation starter!
Constructing a Wooden Picture Frame
Personalize your home decor by creating a beautiful wooden picture frame to showcase your cherished memories. With this simple DIY project, you can easily customize the frame to perfectly suit your style and preferences, making it a unique addition to your living space.
All you’ll need is a few basic materials and tools, including:
- Wooden board
- Saw
- Sandpaper
- Wood glue
- Clamps
- Screws or nails
- Hanging hardware
- Paint or stain (optional)
Start by measuring and cutting the wooden board to the desired size and shape of your frame. Sand the edges and surfaces of the board to smooth out any rough spots. Next, use wood glue and clamps to assemble the frame, making sure the corners are flush and secure. Allow the glue to dry fully before removing the clamps.
If desired, you can paint or stain the frame for a personalized touch. After the paint or stain has dried, attach the hanging hardware to the back of the frame and insert your favorite photo or piece of art. Your unique and beautiful wooden picture frame is ready to be displayed!
Making a DIY Wooden Key Holder
Tired of losing your keys? A wooden key holder is an easy solution that also adds a touch of charm to your entryway. Follow these steps to create a functional and stylish key holder that can be customized to fit your personal style:
What You’ll Need:
- Wooden board
- Hooks or knobs
- Sanding paper
- Stain or paint (optional)
- Drill
- Screws and wall anchors
Step-by-Step Instructions:
- Choose your wooden board. You can use a reclaimed piece of wood or buy a new one from a hardware store.
- Sand the board until it’s smooth and free of any rough edges.
- Choose the number of hooks or knobs you want to use and measure their placement on the board. Mark where the screws will go with a pencil.
- Drill pilot holes for the screws to prevent the wood from splitting.
- Attach the hooks or knobs to the board with the screws.
- If you want to add color, paint or stain the board according to your preference.
- Attach wall anchors to the wall where you want to hang the key holder. Make sure to place them correctly and securely.
- Screw the wooden key holder to the wall using the wall anchors.
- Hang your keys and enjoy your new, stylish DIY wooden key holder!
Customize your key holder by painting or staining the wood to match the color scheme of your entryway. You can also use decorative knobs or hooks to add some personality to your key holder. Not just aesthetically pleasing, a wooden key holder will also help you keep your keys organized and ensure that you never misplace them again.
Building a Wooden Bird Feeder
Want to bring some chirping into your garden? A wooden bird feeder is an excellent way to attract birds and offer them a tasty treat. It’s also a fun and easy DIY project that you can do with your kids or friends. A wooden bird feeder is not only functional but can also add charm to your yard.
Materials You Will Need:
- 1 x 6 x 8 pine board
- 1 x 4 x 4 pine board
- Wood glue
- 1-inch brad nails
- Outdoor wood screws
- Acrylic paint or wood stain
- Hanging hardware
- Birdseed
Instructions:
- Cut the boards to the size according to the plan.
- Attach the sides to the front and back using glue and brad nails.
- Drill a few drainage holes in the bottom of the feeder.
- Attach the roof to the bird feeder using outdoor wood screws.
- Paint or stain the bird feeder with acrylic paint or wood stain.
- Attach the hanging hardware to the top of the feeder.
- Fill the feeder with birdseed and hang it in a suitable spot in your yard.
Pro Tip: Clean the feeder regularly to prevent the spread of disease among the birds. Scrub off any debris and rinse with a mild solution of bleach and water.
A wooden bird feeder is a great way to attract birds and add a touch of nature to your yard. You can customize it to match your outdoor decor and enjoy hours of bird watching. The best part is, it’s an easy and fun project that you can do with your loved ones.
Creating a Wooden Tablet Stand
If you’re tired of propping up your tablet with pillows or books, why not create a personalized wooden tablet stand? This DIY tablet stand is not only aesthetically pleasing but also functional and adjustable, making it perfect for hands-free viewing or following recipes while cooking.
To get started, you’ll need some basic woodworking tools, including a saw, drill, sandpaper, and wood glue. You’ll also need some wooden dowels, a wooden board, and a backing plate to hold your tablet securely in place.
Step-by-Step Instructions
- Cut your wooden board to the desired length and width for your stand.
- Cut two wooden dowels to the same length as your board and sand them down to a smooth finish.
- Drill two holes into the board for the dowels to slot into, ensuring they are spaced evenly apart.
- Glue the dowels into the holes and allow them to dry completely.
- Create a backing plate for your tablet by cutting a smaller piece of wood, drilling two holes, and sanding it down.
- Attach the backing plate to the top of the dowels using wood glue.
- Adjust the angle of your tablet stand by sliding the backing plate up or down the dowels.
- Decorate your stand with paint, wood stain, or other embellishments to match your style.
Now that you’ve created your wooden tablet stand, you can enjoy hands-free viewing of your favorite movies, TV shows, and recipes with ease. Plus, you can customize it to match your home decor and personal style, making it a truly unique addition to your tech accessories.
Designing a Wooden Magazine Holder
Are your magazines cluttering up your living space? A wooden magazine holder is an attractive and convenient solution to keep them organized and within reach.
In this DIY project, we will show you how to design a magazine holder that complements your decor. Follow these steps to create a stylish and functional accessory that will enhance your living space.
Materials Needed
| Material | Quantity |
|---|---|
| Wooden board | 2 |
| Saw | 1 |
| Measuring tape | 1 |
| Wood glue | 1 |
| Wood screws | 4 |
| Sandpaper | 1 |
Steps to Follow
- Measure and cut the wooden board into two pieces of equal size.
- Sand the edges of both pieces to remove any roughness.
- Glue the two pieces together at one end, making sure they are aligned.
- Allow the glue to dry completely.
- Measure and mark the center of the glued end of the holder.
- Attach the wood screws to the marked center, securing the two pieces of the holder.
- Sand any rough or uneven areas, and your wooden magazine holder is now ready to use.
Now that you have a beautiful and practical wooden magazine holder, keep it filled with your favorite publications and enjoy a tidier living space.
Building a Wooden Bookshelf
If you’re a book lover, a wooden bookshelf is a must-have piece of furniture in your home. Not only is it a fantastic way to store and display your favorite books, but it can also be a visually appealing addition to any room.
With some basic woodworking skills, you can build your very own custom bookshelf to suit your style and space. Here are the steps you will need to follow:
- Measure the space: Before beginning on your wooden bookshelf, measure the space where it will be placed. This will give you a good idea of how large you can go with the bookshelf’s dimensions.
- Choose your design: There are many designs to choose from when it comes to bookshelves. You could opt for a simple classic look, or maybe get creative with different shapes or add accent features, such as ladder or floating shelves.
- Choose your wood: For a sturdy bookshelf, hardwoods like oak, maple, cherry, or walnut are the best options. Softwoods like pine or cedar could be used but, generally speaking, they are not as durable.
- Prepare your wood: Cut your wood into the right dimensions and sand them smooth to create a polished finish.
- Assemble the bookshelf: This is the fun part! Using dowels, screws, or other fasteners, assemble your custom bookshelf according to your chosen design.
- Add finishing touches: To make your bookshelf truly unique, consider adding details like molding or decorative handles. Then paint, stain, or seal, your bookshelf so that it will last for years to come.
With just a few tools and some basic know-how, you can create a timeless, beautiful wooden bookshelf that will hold your treasured books for years to come!
Creating a Wooden Plant Stand
Bring a touch of nature into your home with a wooden plant stand that you can make yourself. Not only is it a beautiful addition to any room, but it also lets you showcase your favorite plants. Follow these simple steps to make your own:
- First, gather your materials. You’ll need:
- Wooden dowels (1 inch)
- Plywood (half an inch)
- Screws (2 inches)
- Saw
- Drill
- Sandpaper (medium and fine grit)
- Wood glue
Cut the plywood into a square or circular shape for the base of the stand, and sand the edges until smooth.Using the saw, cut four wooden dowels to the desired length for the legs of the stand. Sand them until smooth.Attach the legs to the base using screws and wood glue, making sure they are evenly spaced and level.Allow the glue to dry overnight, then sand the entire stand until smooth.Apply a coat of wood stain or paint to the stand if desired, then let it dry.Your wooden plant stand is now ready! Simply place a potted plant on top and admire your handiwork.
With a little bit of time and effort, you can create a beautiful and functional wooden plant stand that will impress your friends and family. Give it a try and see the results for yourself!
Crafting a Wooden Coat Rack
When you’re looking for a practical and stylish way to keep your jackets and hats organized in your entryway or mudroom, consider crafting your own wooden coat rack. With just a few supplies and some basic woodworking skills, you can create a custom piece that perfectly fits your space and personal style.
To get started on your DIY wooden coat rack, you’ll need:
- 1×4 pine board, at least 4 feet long
- Coat hooks, 4-6 depending on the size of your board
- Clip-on hardware, 2 pieces
- Sandpaper, medium grit
- Stain or paint, optional
- Wood glue
- Screws
- Drill
- Saw
Instructions:
- Measure and mark your board at 5-inch intervals for the hooks.
- Cut your board to the desired length. Sand the edges down.
- Glue your coat hooks to the board, lining them up with the marks you made in step 1. Allow to dry according to the product instructions.
- Attach the clip-on hardware to the back of the board towards the top to allow for easy hanging.
- Screw the board into the wall by marking the studs, using wall anchors if necessary.
- Finish with a stain or paint of your choice, if desired.
- Hang your coats!
Creating a wooden coat rack can be a simple yet rewarding woodworking project that adds function and style to your home. With just a few tools and supplies, you can create a custom piece that perfectly fits your needs. Show off your finished product and enjoy the compliments you’ll receive when guests see your new DIY coat rack.
Conclusion
We hope you found these 35 easy and inspiring wood projects for beginners helpful and enjoyable. Remember, woodworking is a fulfilling and creative hobby that can lead to beautiful and functional creations for your home and beyond. With the essential tools and guidance provided in this article, you are well on your way to honing your woodworking skills and taking on more challenging projects. Don’t be afraid to experiment with new designs and techniques, and always prioritize safety in your crafting endeavors. Happy woodworking!
FAQ
What are some examples of wood projects for beginners?
Some examples of wood projects for beginners include building a simple planter box, creating a personalized cutting board, crafting a rustic wooden shelf, and constructing a wooden bird feeder.
What are the essential tools for woodworking beginners?
The essential tools for woodworking beginners include a tape measure, a miter saw, a drill, a sander, a chisel set, and clamps.
How do I build a simple wooden planter box?
To build a simple wooden planter box, you will need to measure and cut the wood, assemble the panels, and attach the bottom. Detailed instructions can be found in Section 3 of this article.
How can I create a personalized wooden cutting board?
To create a personalized wooden cutting board, you will need to select the type of wood, measure and cut the board, shape and sand it, and apply a food-safe finish. Section 4 of this article provides a step-by-step guide.
What is the process for crafting a rustic wooden shelf?
Crafting a rustic wooden shelf involves selecting the wood, measuring and cutting the pieces, assembling the shelf, and adding any desired finishing touches. Section 5 of this article offers detailed instructions.
How do I build a wooden wine rack?
Building a wooden wine rack requires measuring and cutting the pieces, assembling the rack, and ensuring proper stability. Follow the instructions in Section 6 for a successful DIY wine rack project.
What is the process for designing a wooden jewelry organizer?
Designing a wooden jewelry organizer involves measuring and cutting the wood, constructing the organizer, and adding any desired compartments or hooks. Section 7 provides a step-by-step guide.
How can I construct a wooden picture frame?
To construct a wooden picture frame, you will need to measure and cut the wood, assemble the frame, and add any desired finishes or embellishments. Section 8 of this article offers detailed instructions.
What is the process for making a wooden key holder?
Making a wooden key holder requires measuring and cutting the wood, designing and assembling the holder, and adding hooks or other hanging mechanisms. Section 9 provides a step-by-step guide.
How can I build a wooden bird feeder?
Building a wooden bird feeder involves selecting the wood, measuring and cutting the pieces, assembling the feeder, and adding any desired finishes or decorative elements. Section 10 of this article offers detailed instructions.
What is the process for creating a wooden tablet stand?
Creating a wooden tablet stand requires measuring and cutting the wood, assembling the stand, and ensuring proper adjustability. Follow the instructions in Section 11 for a successful DIY tablet stand project.
How do I design a wooden magazine holder?
Designing a wooden magazine holder involves measuring and cutting the wood, constructing the holder, and adding any desired compartments or storage features. Section 12 provides a step-by-step guide.
What is the process for building a wooden bookshelf?
Building a wooden bookshelf requires measuring and cutting the wood, assembling the shelf, and ensuring proper stability and weight distribution. Follow the instructions in Section 13 for a successful DIY bookshelf project.
How can I craft a wooden plant stand?
To craft a wooden plant stand, you will need to select the wood, measure and cut the pieces, assemble the stand, and add any desired finishes or decorative elements. Section 14 of this article offers detailed instructions.
What is the process for creating a wooden coat rack?
Creating a wooden coat rack involves measuring and cutting the wood, constructing the rack, and adding hooks or other hanging mechanisms. Section 15 provides a step-by-step guide.