Mastering the Art of Lacquer Finishing: A Step-by-Step Guide
Lacquer finishing is a revered art in the world of woodworking, known for its ability to transform a simple piece of wood into an elegant and glossy masterpiece. However, applying a lacquer finish the right way requires skill, patience, and knowledge of the correct techniques. In this comprehensive guide, we will walk you through the essential steps and tips to ensure your lacquer finish is flawless and durable.
Creating a Dust-Free Environment
The first step in preparing for a lacquer finish is setting up a clean, dust-free environment. Lacquer is sensitive to dust and particles, which can mar its smooth surface. Ensure your workspace is well-ventilated but free from drafts that could blow dust onto your workpiece. Cover any surfaces that might collect dust, and consider using an air filtration system to keep the air as clean as possible.
Gathering Necessary Tools and Materials
Before you begin, gather all the necessary tools and materials. This includes fine grit sandpaper, a high-quality brush or spray gun, tack cloth, and, of course, your chosen lacquer product. If you’re using a spray gun, make sure it’s clean and in good working order.

Sanding for a Smooth Base
A smooth base is crucial for a perfect lacquer finish. Start by sanding your workpiece with fine grit sandpaper. This smoothens the wood and prepares it to bond with the lacquer. Ensure that all surfaces are even and free from previous finishes or rough spots.
Cleaning and Dust Removal
Once your piece is sanded, thoroughly remove all dust and debris. Use a tack cloth or a damp cloth to wipe down the surface. This step is vital as even the smallest particle can become evident once the lacquer is applied.
Choosing the Right Lacquer
Selecting the right type of lacquer is pivotal. Lacquers come in various forms, such as nitrocellulose, acrylic, and water-based options. Each type has its advantages and ideal use cases. For example, UV-resistant lacquers are excellent for pieces that will be exposed to sunlight.
Undercoat Compatibility Considerations
If you’re applying lacquer over an existing finish or undercoat, ensure compatibility. Conduct a small test on a hidden area to check how the lacquer adheres and reacts with the undercoat.
Applying the First Coat
Begin by applying a thin coat of lacquer. Whether you’re using a brush or a spray gun, the key is to apply the lacquer evenly and thinly. This first coat acts as a primer and sealer, providing a base for subsequent layers.
Techniques for Even Coats
Achieving even coats is essential for a smooth finish. When using a spray gun, maintain a consistent distance and motion to avoid drips and runs. If brushing, use long, even strokes and avoid overloading the brush.
Sand Between Coats for a Smooth Finish
After the first coat has dried, lightly sand the surface with fine grit sandpaper. This process, known as ‘denibbing,’ helps to remove any imperfections and provides a better surface for the next coat to adhere to.
Achieving the Desired Thickness with Multiple Lacquer Layers
Repeat the process of applying thin coats and sanding between each. Usually, 2-3 coats are sufficient, but you may require more depending on the desired thickness and finish.
Understanding Fast Drying Time
One of the characteristics of lacquer is its rapid drying time. This can be advantageous as it allows for quicker completion of projects. However, it also requires you to work efficiently and avoid overworking the finish.
Curing Time Considerations for Durable Finish
While lacquer dries to the touch quickly, it takes longer to fully cure. Curing time can range from a few days to a week. During this period, avoid subjecting the surface to heavy use or harsh conditions.
How to Achieve a High-Gloss Lacquer Finish
For a high-gloss finish, apply several thin layers of a high-gloss lacquer, sanding lightly between each layer. This builds up a deep, lustrous finish that is both beautiful and protective.
Final Buffing and Polishing
After the final coat of lacquer has cured, you can enhance the shine with buffing and polishing. Use a polishing compound and a soft cloth to buff the surface to a brilliant shine.
Working in a Ventilated Area
Lacquer fumes can be harmful, so it’s important to work in a well-ventilated area. If possible, work outdoors or in a space with plenty of airflow.
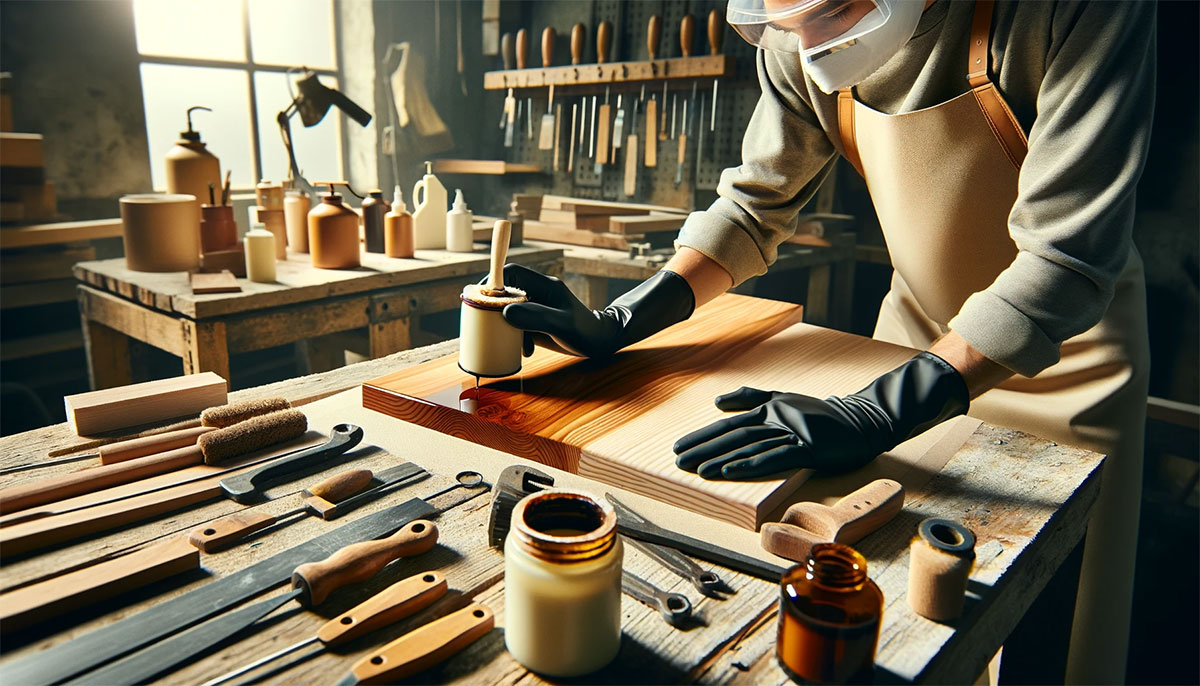
Essential Safety Gear for Lacquer Application
Always wear the appropriate safety gear when working with lacquer. This includes gloves, eye protection, and a respirator mask. Safety should never be compromised.
Conclusion
Applying a lacquer finish is a skill that can elevate your woodworking projects to a professional level. By following these steps and understanding the nuances of working with lacquer, you can achieve a stunning, durable finish. Remember, practice makes perfect, so don’t be discouraged if your first few attempts aren’t flawless. With patience and practice, you’ll soon master the art of lacquer finishing.
Additional Resources
To further hone your skills, consider exploring FAQs on lacquer finishing, as well as additional reading materials and video tutorials. These resources can provide deeper insights and advanced techniques to enhance your lacquering abilities.